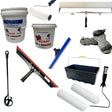
Epoxy Tool Kit
"Great products, Will be purchasing more soon"

Metallic Epoxy Tool Kit is backordered and will ship as soon as it is back in stock.
Pickup available at Breakthrough Coatings Warehouse
Usually ready in 24 hours
The tool Kit includes:
To ensure the best performance and long-lasting results, follow these care guidelines:
Following these steps will help maintain product effectiveness and durability over time.
Shipping:
Returns:
Your satisfaction is our priority. If you have any issues, we’re here to help.

Industrial Strength
Built for durability

Easy DIY Application
Quick DIY setup
Made in USA
Manufactured in USA
Metallic Epoxy Tool Kit

Metallic Epoxy Tool Kit is backordered and will ship as soon as it is back in stock.

Spread the mixed epoxy evenly on the prepared floor to ensure a smooth base layer.

Remove any loose debris or dust to create the perfect surface for bonding the flakes.

Broadcast the decorative flakes into the wet epoxy, allowing them to sink in and create a vibrant finish.

Use a roller to gently press and lock the flakes into the epoxy, ensuring they’re fully encapsulated and smooth.
Overall rating: 5.0 / 5 from 7 reviews.
Review topics: [].
"Great products, Will be purchasing more soon"
"Excellent customer service would recommend forsure without a doubt"
"Already reviewed"
"Although they look a little like clown shoes, nobody doing epoxy wears as a fashion statement. They are perfect for the job and can probably be use to help aerate your lawn and get you some exercise at the same time :0"
"First off, I have never used epoxy before and do not paint or do anything like that for a living. Throughout the process, I repeatedly called and spoke with Jason or Jacob (at Colored Epoxies). E.g., what to purchase, how the concrete needed to be prepared, and how the epoxies are applied were only a few of our conversations. Here is what I purchased for a 450sq ft workshop: - Two gal. of white epoxy with one gal. of hardener - Three gals of clear epoxy with 1.5 gals of hardener with 20 oz of pearl pigment - Two gal. of clear epoxy with one gal. of hardener to be used with 8 oz of Maui Blue and 4oz of gunmetal grey pigment (two gal. for blue, one gal. for grey) - I used a total of 10.5 gallons for my project. This is how the concrete was prepped. I rented a 10" grinder from Home Depot. They say it is a four-hour rental, but I was told you actually have up to six hours to return the equipment without having extra fees. So, with help, we 'wet' ground the floor for 3.5 hours straight. Afterward, quite a few spots still needed to be ground. So I used a 4.5" angle grinder to remove the remaining stains. This went quicker than I thought it would. The floor was repeatedly rinsed and allowed to dry for two days. I have an AC in the shop and that controlled the temperature and humidity. Next, the floor was swept out, vacuumed, then taped the area off. Finally, we started mixing the white epoxy - for 4-5 minutes (the primers coat). Using an 18" roller, the white went down. However, I did have a slight problem. From what I learned, you have up to three hours to contend with bubbles. Since this was on a Sunday, I could not call Colored Epoxies for advice. Around the 1:15 mark, the bubbles were pretty much set to where nothing could be done. I could have sanded these down the next day, but I was ready to finish. So I pushed ahead. On Monday, we mixed all the clear epoxies and pigments into pre-marked buckets. The 4.5 gal. of pearl went down first. The white epoxy went down easily with excess to spare. Meanwhile, the pearl seemed lacking, and the notched squeegee could not spread it enough. I used an 18" roller to spread the mix evenly over the entire floor. Next, we threw the grey down. Only being one gal., it covered a good portion. Lastly, the two gal. of blue went down. I used the magic squeegee to mix and create the patterns. Cross-rolling was done a few times, followed by a torch. The torch worked great! Of note, the grey was almost overwhelming, a little goes a long way. You can see the finished result in the attached pictures. Big thanks to the folks at Colored Epoxies."
"I appreciate most of what I need being in one kit. The only things I needed to buy separately or already had are things like isopropyl alcohol, painters tape, broomstick for roller, broom, drill, leaf blower, grinder, diamond grinding cup, and mortar (to make epoxy mortar to fill cracks and expansion joints)."
"the tool kit was great and a fair price"
Durable & Chemical Resistant
Built to resist chemicals, impact, and heavy daily use
Beautiful Colors & Flakes
Custom finishes for a premium decorative look.
Perfect for DIY & Projects
Simple systems designed for easy application.
Zero VOC & Eco-Friendly
Low-emission formulas safe for indoor use.
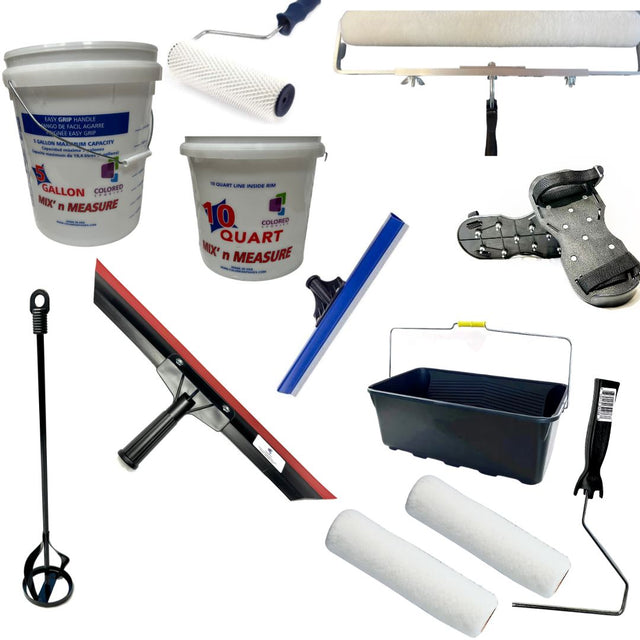
The tool Kit includes: